Temperatures are climbing, snow is melting, and it’s time to pull the winter tires off. But before you bolt on the summer or all-season set, a few minutes of inspection can save you from vibrations, uneven wear, and the frustration of a TPMS light that won’t turn off.
Key takeaways
- Check the DOT date code on every tire — rubber degrades even if tread looks fine
- Measure tread depth across three points on each tire to catch uneven wear early
- Always torque lug nuts to the manufacturer’s spec in a star pattern
- Clean hub mating surfaces to prevent vibration at highway speed
- Most cars need a TPMS relearn procedure after swapping wheel-and-tire assemblies
Read the DOT date code first
Every tire sold in North America carries a four-digit DOT date code on the sidewall, stamped at the end of the DOT serial number. The first two digits are the week, the last two are the year. A tire stamped “2319” was made in the 23rd week of 2019.
Why does this matter in spring? Because tires age whether you drive on them or not. Rubber compounds oxidize, sidewalls develop micro-cracks, and grip deteriorates. Most tire manufacturers and NHTSA recommend replacing tires that are six years old regardless of tread depth. If your summer set has been sitting in the garage since 2018, they may look fine but perform poorly in wet braking situations.
Before mounting anything, check every tire. If any are approaching that six-year window, factor replacement into your spring budget rather than discovering the problem mid-season.
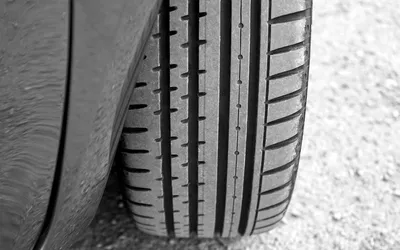
Measure tread depth the right way
A quick penny test tells you whether a tire is legally bald, but it doesn’t tell you whether the tire is wearing evenly. Grab a tread depth gauge — they cost a few dollars at any parts store — and measure at three points across the face of the tire: inner shoulder, center, and outer shoulder.
If the center is worn more than the edges, the tire was likely overinflated. If the shoulders are worn more, it ran underinflated. Significant differences between inner and outer shoulders usually point to an alignment issue. Catching these patterns now means you can fix the root cause before you chew through another set.
For most all-season and summer tires, 4/32“ is the practical replacement threshold for wet-weather grip, even though the legal minimum is 2/32“. If you’re hovering around 4/32“ this spring, plan ahead — you’ll be shopping for tires before fall.
Clean the hub and check the hardware
This is the step most people skip, and it’s the number-one cause of post-swap vibrations. Corrosion builds up on the hub mating surface over winter, especially in salt-belt states. That rust layer prevents the wheel from seating flat against the hub, and no amount of balancing will fix the shimmy.
Use a wire brush or a dedicated hub cleaning tool to remove corrosion from the hub face and the centering ring area. Apply a thin coat of anti-seize to the hub face — not the studs — to make next fall’s removal easier.
While you’re at it, inspect the lug studs and nuts for stripped threads or signs of over-torquing. Stretched studs are a safety issue. Replace any that look questionable. Lug nuts with swollen chrome caps — common on factory Ford and Dodge lug nuts — should be replaced, as they won’t seat properly against the wheel.
Torque in a star pattern to spec
Hand-tightening lug nuts and calling it done is asking for trouble. Every vehicle has a specific lug nut torque specification, usually between 80 and 100 ft-lbs for passenger cars and up to 140 ft-lbs for trucks and SUVs. Check your owner’s manual or a quick search for your year, make, and model.
Use a torque wrench, not an impact gun, for final tightening. Snug each nut by hand first, then torque them in a star (criss-cross) pattern to ensure even clamping pressure across the rotor hat. Uneven torque can warp brake rotors over time and cause pulsation under braking.
After driving 50 to 100 miles, re-torque every wheel. Wheels settle slightly after initial installation, and this re-torque step catches any that have loosened. It takes five minutes and prevents the worst-case scenario.
Handle the TPMS relearn
If you’re swapping complete wheel-and-tire assemblies — say, a dedicated winter set on steel wheels back to summer alloys — each set has its own TPMS sensors with unique IDs. Your car’s ECU needs to learn which sensors are now installed.
Some vehicles handle this automatically after a few minutes of driving. Others require a manual relearn procedure using a TPMS activation tool, or a specific sequence of button presses (common on GM vehicles). A few require a trip to the dealer or a shop with the right scan tool.
Check your owner’s manual for the procedure before you start. If you ignore the TPMS light, you lose your only low-pressure warning system — and you won’t notice a slow leak until the tire is dangerously low.
Set cold pressures and record everything
After the swap, set all four tires to the pressure listed on the driver’s door jamb placard — not the maximum pressure stamped on the tire sidewall. Do this when the tires are cold, meaning the car has been sitting for at least three hours or driven less than a mile.
Write down the date, the mileage, and the tread depth measurements for each tire. Keeping a simple log lets you track wear rates across seasons and catch alignment problems before they cost you a set of tires. A note on your phone works fine.
Helpful references
Bottom line
A spring tire swap done right takes an extra 20 minutes compared to just slapping the wheels on. That time pays for itself in even wear, zero vibrations, and a TPMS system that actually works when you need it.