Your car’s paint survived winter, but it did not come through clean. Road salt, iron brake dust, tar spray, and industrial fallout bond to clear coat at a molecular level – a regular wash removes the loose dirt sitting on top, but the contaminants embedded in the surface stay put. Left alone through spring and summer, they oxidize, expand, and eat into the finish.
Key takeaways
- A standard wash only removes loose surface dirt; bonded contaminants like iron particles and tar require chemical decontamination.
- Iron removers work by reacting with ferrous particles and turning purple – the color change confirms the product is dissolving embedded metal.
- The plastic bag test is the fastest way to determine whether your paint needs decontamination: slide your hand inside a sandwich bag and run it across a washed panel.
- The correct sequence matters: rinse, foam, contact wash, iron remover, tar remover, clay, inspect, protect.
- Know when to stop. If contamination has already caused pitting or staining that chemical decon cannot remove, paint correction with a machine polisher (or a professional detailer) is the next step.
What iron fallout actually is and why it matters
Iron fallout is a catch-all term for microscopic ferrous metal particles that embed in your car’s clear coat. The two main sources are brake dust – generated every time your brake pads clamp onto the rotors – and rail dust, which is fine metallic debris shed by trains and carried by wind across wide areas. If you live within a few miles of railroad tracks or commute on highways behind heavy truck traffic, your car collects more of it.
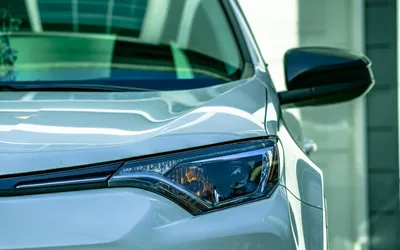
These particles are invisible individually, but over a winter of accumulation they create a rough, gritty texture you can feel even after a thorough wash. The real damage starts when water and oxygen reach the embedded metal. It rusts in place, expanding and fracturing the clear coat from inside. On white or light-colored paint, you may notice tiny orange or brown specks. On darker colors, the texture change is what gives it away first.
An iron remover (sometimes labeled “fallout remover” or “decon spray”) contains an acid or a reactive agent – usually a thioglycolic acid compound – that dissolves ferrous oxide on contact. When you spray it on a contaminated panel, the liquid turns purple or red as it reacts with the iron. The color change is not marketing theater; it is a genuine chemical reaction showing you where contamination was hiding.
The plastic bag test: thirty seconds to a diagnosis
Before you commit to a full decontamination process, find out if you need one. Wash and dry one section of the car – a fender or door panel works well. Then put your hand inside a thin plastic sandwich bag or produce bag, and glide your fingers lightly across the paint.
The bag amplifies surface texture in a way your bare skin cannot match. Clean, smooth paint feels like glass through the plastic. Contaminated paint feels gritty, rough, or grabby – like dragging your hand across fine sandpaper. The worse the contamination, the more obvious the difference.
If the panel feels smooth, you can probably skip chemical decon and go straight to a protective layer. If it feels rough, the full process outlined below is worth your time.
The decontamination sequence, step by step
Order matters here. Each step removes a specific type of contamination, and doing them out of sequence either reduces effectiveness or risks marring the paint. Here is the full process:
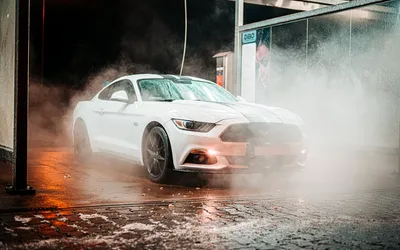
1. Rinse. Pressure-rinse the entire car to remove loose dirt, salt, and grit. Do not touch the paint yet. A pressure washer at 1,200-1,900 PSI is ideal; a strong garden hose nozzle works if that is what you have.
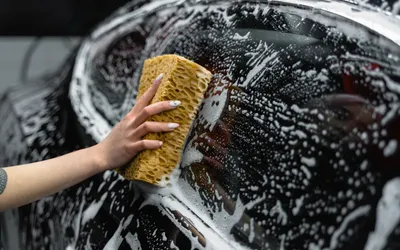
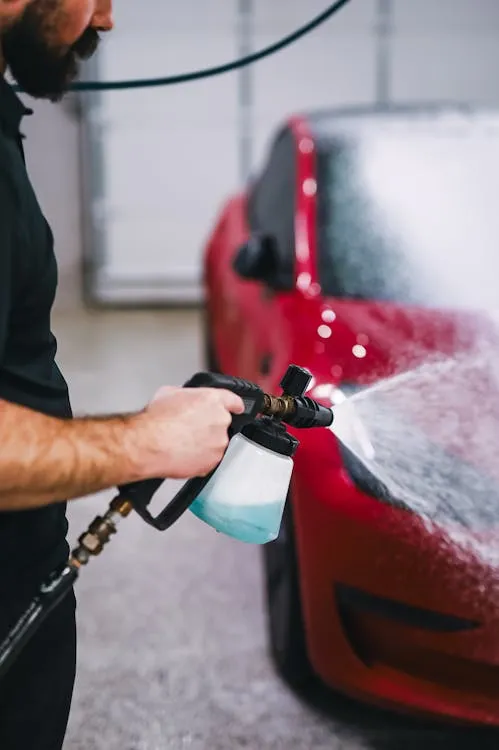
2. Foam cannon or pump sprayer pre-wash. Lay down a thick coat of snow foam or a dedicated pre-wash solution and let it dwell for three to five minutes. This lifts and encapsulates remaining loose particles so your wash mitt does not drag them across the paint.
3. Contact wash. Two-bucket method: one bucket with clean rinse water, one with your wash solution. Use a plush microfiber mitt. Wash top-down, rinsing the mitt frequently. Dry the car completely before moving to chemical decon – water dilutes the products and reduces dwell time.
4. Iron remover. Spray the iron remover onto one panel at a time and wait two to four minutes. Watch for the purple bleed. Do not let it dry on the surface – if it starts to dry, mist it with water. Agitate stubborn spots with a soft detailing brush. Rinse thoroughly. Repeat on every painted panel, including door jambs and behind side mirrors where brake dust accumulates heavily.
5. Tar remover. Tar spots show up as small black or brown specks, usually concentrated on lower panels, behind wheel arches, and on rocker panels. Spray a tar and adhesive remover onto affected areas, let it dwell for a minute or two, and wipe with a microfiber towel. Tar remover is typically solvent-based, so work in a ventilated area and do not let it sit on rubber trim or plastic for extended periods.
6. Clay. After chemical decon, clay barring removes anything the chemicals missed – tree sap residue, overspray, mineral deposits. Use a clay bar or a synthetic clay mitt with a generous coat of clay lubricant. Work in small sections, keeping the surface wet. When the clay glides freely without grabbing, that section is clean.
7. Inspect. Run the bag test again. The difference should be dramatic. Now examine the paint under direct light at a low angle – look for swirl marks, water spots, and any staining the decon process could not remove.
When to stop and call a detailer
Chemical decontamination and claying address what is bonded to the surface of the clear coat. They cannot fix what is already embedded in or below it. If your post-decon inspection reveals orange pitting (where iron has already rusted and cratered the clear coat), heavy water spot etching, or deep swirl marks, the next step is paint correction – which means cutting into the clear coat with a compound and a machine polisher to level the surface.
Paint correction is a skill that takes practice and carries real risk. An aggressive cutting pad with too much pressure can burn through clear coat on edges, body lines, and anywhere the factory paint is thin. If you have not done it before, a single-stage polish with a light-cutting compound on a finishing pad is the safest entry point. Anything beyond that – especially on a daily driver with unknown paint history – is better left to a professional detailer.
A professional single-stage correction typically runs $300-$500 for a sedan. A full multi-stage correction with ceramic coating application can run $800-$1,500 depending on the vehicle size and condition. That sounds steep, but it is less than a respray on a single panel.
Choosing the right protection after decon
A decontaminated surface is a stripped surface. The wax, sealant, or coating that was protecting the paint before winter is almost certainly gone after the chemical decon process. You need to apply something before you drive the car again, or every contaminant you just removed starts re-bonding immediately.
Your three main options, in order of durability:
Carnauba wax delivers a warm, deep gloss and is easy to apply by hand, but it lasts four to eight weeks depending on conditions. Good for show cars or garage queens; not ideal as the sole protection on a daily driver.
Paint sealant (synthetic polymer) lasts three to six months, offers better chemical resistance than wax, and applies just as easily. For most people doing a spring decon, a quality sealant is the practical choice.
Ceramic spray coating lasts six to twelve months, adds strong hydrophobic behavior, and requires minimal curing time compared to professional-grade ceramic coatings. Products like Turtle Wax Hybrid Solutions Ceramic Spray or Meguiar’s Hybrid Ceramic Wax sit in the $12-$20 range and are genuinely effective for the price.
If you already have a professional ceramic coating on the car, check with your installer before applying anything over it. Some ceramic coatings are designed to be maintained with a specific topper, and layering the wrong product can interfere with the coating’s hydrophobic properties.
Common mistakes that cause more harm than good
Claying before washing. Clay drags whatever is on the surface across the paint. On an unwashed car, that means grinding salt and grit into the clear coat and creating the exact kind of scratches you are trying to prevent.
Letting iron remover dry. The chemical reaction that dissolves iron also becomes aggressive to clear coat if left too long. Work in the shade, work one panel at a time, and rinse promptly.
Using an old clay bar. Once a clay bar picks up contamination, those particles are embedded in the clay. If you drop it on the ground, it is trash. Even between uses, fold and knead the clay to expose a fresh surface before each section. Most clay bars are good for three to five uses on a midsize car.
Skipping the rinse between chemical steps. Iron remover and tar remover are different chemistries. Mixing residues on the surface can leave streaks or interfere with the next product’s effectiveness. Rinse and dry between each chemical step.
Helpful references
Bottom line
A spring decontamination is not about making the car look shiny for a weekend. It is about removing embedded material that is actively degrading your clear coat and starting the warm-weather months with a surface that is genuinely clean, smooth, and protected.